
When I wrote part 1 of this post I'd been planning to lower the cathode bypass capacitor values in order to clean up the up the bass response. What I ended up doing was removing the cathode bypass capacitors all together in order to get a bit of compression for a fuller low volume clean tone. The effect is a more roundness and a good deal less volume - very nice for a bedroom level clean sound. This meant I needed to find some other ways to control the low end (see the Input Voicing and Presence Plus mods).
For this mod I put in a three pole four position rotary switch that adds the cathode bypass caps in one by one. With the rotary switch the gain of the amp goes up with each setting until it reaches the stock (fully bypassed) position:

This could easily have been three separate switches, but I thought the single control made the operation a bit clearer and didn't clutter up the chassis as much. Since I'm limiting bass response in a couple other ways I ended up keeping the caps at their stock values. The first and second stages could easily have values from part 1 substituted if you have a need for greater bass reduction.
Here is:
THE UBIQUITOUS DISCLAIMER: AKAVALVE ASSUMES NO RESPONSIBILITY FOR THE SAFETY OF ANYONE IMPLEMENTING THESE INSTRUCTIONS. IF YOU ARE NOT FAMILIAR WITH SAFE PRACTICE IN HIGH VOLTAGE CIRCUITS, DO NOT ATTEMPT THIS YOURSELF.
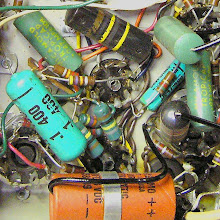
And here's the internal view of the switch with the ground wires in place:

This is how the ground wires hook up:

The wire with the black arrow connects to the lower side of the C4 space on the pc board.
The wire with the blue arrow connects to the lower side of the C10 space on the pc board.
The wire with the red arrow connects to the lower side of the C3 space on the pc board.
Here is the rest of the switch wiring. Notice that the leads for the large blue cap (which serves as C4) jump three pins on the switch.

The stage 2 wire jumper two pins. This wire attaches to the shrinkwrapped end of C10 (indicated by the red arrow).

The wire connecting stage 1 to the switch connects to only one pin. It connects to the shrinkwrapped end of C3 (again, indicated by the red arrow).

If you've removed these caps and are reinstalling them, make sure you observe the proper polarity when you put them back in. The indented end of the cap lines up with the indent in the white outline on the pc board.
For convenience of installation, I replaced the original C4 with a axial lead cap of the same value. It's the large blue cap in the photo below. The negative side of the cap connects to the switch and the positive side is connected to the high side of the pc board connection for C4. The negative lead of the cap holds it pretty well in place but there's a dab of silicone underneath just for good measure.

This switch functions kind of like a staged clean master volume. If you're interested in getting distortion out of your preamp circuit, this mod could be rearranged to serve as a sort of dirty master volume instead. If you're interested let me know and I'll post the details.


7 comments:
"If you're interested in getting distortion out of your preamp circuit, this mod could be rearranged to serve as a sort of dirty master volume instead. If you're interested let me know and I'll post the details."
i'd be interested if you feel like posting up the details.
-and thanks for what you have already collected!
me too! Please post when you can
I can't test it now as the amp is back with it's owner but it would be easy to experiment and see if it'll work for you before you decide to install it on a switch.
If you already have a gain mod (like the Frondelli mod) in the first stage then for a first cut, just remove the cathode bypass cap on the 6V6.
That should allow to turn the volume knob up a bit more for the same output volume from the amp.
Depending on your guitar's output it may work even without the additional gain in stage 1.
What you want is to turn the volume up enough to be clipping the second stage input, which follows the volume pot.
Removing the bypass cap on the 6V6 then reduces the output stage gain and gives a bit of compression.
Because you would be reducing the gain of the output stage you can increase the gain in the preamp stage (by turning up the volume knob) to get some drive in the preamp circuit.
This reminds me of a common misconception which is sort of a pet peeve of mine. Many people say they want "more gain" when what they want is more drive or more saturation. Gain is amplification. It's true that you can use more gain to produce more distortion - but only if you are driving the circuit beyond it's limits at some point. If you're not doing this then more gain results only in more clean volume.
This is why to get more distortion at the same volume you need to increase the gain in one part of the circuit to drive it into distortion and then decrease it elsewhere to lower the overall output.
Removing the cathode cap on the 6V6 is the step used to lower the overall output in this case.
Hello again akavalve,
if looking for more distortion at lower volume, removing the cathode cap on the 6V6 is enough. No need to bypass the other caps ?
In the same idea, what would be the difference with a triode/pentode switch (i.e. a switch to connect R26 to J3 instead of R11) ?
May I combine the two mods ?
Thanks !
Here is the schematic : http://461.free.fr/Amps/champ600ri/pentode_triode_switch.png
I would really be interested to see the dirty mod voicing, The presence plus and low input work so well I have been so inpressed!!! my own amp has had the negative feedback loop takin out and I have added a standby switch on a 5 amp fuse because I juiced it up to 240 volts( I added caps ). I have also added a triode/pentiode swith and worked on the pcb. my tone stack layout is different to your design so I haven't been able to add the by pass and boost switch :(!!!.
would this mod still work if c10 is removed?
It would be great to see how you would go about getting rid of the input/vol/pcb thing and use real separate parts.
Keep up the Great Stuff
Dan, Liverpool England
I know this thread is almost three years old, but, if you're still out there akavalve, I need help. I just installed the rotary switch for the staged clean volume. When I have it fully engaged with the presence mod on and try to bypass the tone stack, it sends the power tube into the squealing, blue glow of death!!! I can't figure out why because it worked fine before I installed the switch.
Thanks. I love the blog -- wish there was more.
Josiah
Post a Comment