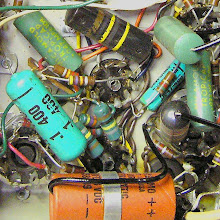
Here's a more detailed look at discharging the filter caps in a Fender Chapion 600.
First I'll get this out of the way:
THE UBIQUITOUS DISCLAIMER: AKAVALVE ASSUMES NO RESPONSIBILITY FOR THE SAFETY OF ANYONE IMPLEMENTING THESE INSTRUCTIONS. IF YOU ARE NOT FAMILIAR WITH SAFE PRACTICE IN HIGH VOLTAGE CIRCUITS, DO NOT ATTEMPT THIS YOURSELF.
With the amp turned off connect the black lead of the multimeter to ground at the speaker jack. This will be the bare wire connected to the sleeve connection on the jack. You can use any ground connection really, but this on is very easy to get a clip onto. Connect the red lead to the top of R11. Set the meter to read DC Volts. Now flip the amp on.

You'll see the voltage on the meter rise quickly to around 420 volts. If you don't see any voltage reading then you've connected things incorrectly or you meter is not set properly. Don't proceed until you've figured out why you have no reading, and be very careful when when moving the probes as there is now very high voltage in the circuit.
When you have the meter connected properly and are getting a 400+ VDC reading shut off and unplug the amp.

When you shut the amp off you will see the voltage dropping slowly on the meter. You are now ready to connect the clip end of the discharge probe to ground. I find the easiest method is to clip it to the sleeve of the input jack.

Mote that the voltage is still dropping slowly even though the probe hasn't been fully connected. This is because the capacitor is bleeding it's charge though the circuit and through the meter itself. This is exactly what we want the discharge probe to do - but faster.
Now touch the other end of the discharge probe to a source of B+ voltage. Here I'm about to make contact with the red lead of the output transformer primary:

Now you will see the voltage drop quite rapidly. This picture covers the change in just a few seconds (click on it for a close up):

Finally all the voltage will be drained out and you're ready to work on you amp.

Note: Turning the amp on is not really not part of the discharging process. The reason I include it is because it insures that you are getting a good voltage reading and that you can watch that reading drop. That way when your meter shows no voltage you know it's because there is no voltage left in the caps not because the meter isn't connected properly.
Second note: If your speaker is still connected to the amp during this procedure you will notice that the voltage drops fairly quickly. This is because the connected speaker is doing the job of the discharge probe. This is actually a perfectly reasonable way to avoid the discharge probe all together. Discharging with the probe is an excellent habit to get into though because not all amps bleed off their caps voltage so quickly on their own. If you decide to forgo the probe, make sure you are absolutely confident in your voltage measurements in order to stay safe.


5 comments:
Good Info!
Thank's
Check the comments on part 1 - Andorephus posted John Frondelli's method there. It's simpler and depending on what you have planned, it may be all you need.
i like this blog
by:- www.tech-world.50webs.com
Thanks for this blog. Lots of great information!
I heard that I shouldn't turn on a tube amp without the speaker connected. Is that not a problem? Or is yours somehow a special case?
Thanks again.
It's not generally a problem to turn an amp on without a load attached. What you want to avoid is running signal into it without a load of some sort attached. That load doesn't need to be a speaker though - it can be a resistor. Is there a specific case your question relates to?
best, Andy
Post a Comment